This article will guide you through two key processes: upgrading to Windows 10 from either Windows 7 or Windows 8, and installing Windows 10 along with the activation process.
The first section will provide step-by-step instructions on upgrading your current operating system (Windows 7 or Windows 8) to Windows 10. This process often involves using tools like the Windows 10 Upgrade Assistant, checking system compatibility, and following prompts to download and install the new OS seamlessly.
The second section will focus on a fresh installation of Windows 10. This includes creating installation media, such as a USB flash drive, and selecting the appropriate options during the installation process. While installing, users may encounter prompts to enter a product key for activation. The article will outline the options for activation, including potential watermarks and limitations associated with an unactivated version of Windows 10.
Upgrade to Windows 10 from Windows 7 or Windows 8
If you are using a legitimate and activated version of Windows 7 or Windows 8, you can upgrade to Windows 10 for free by following these steps:
Check System Requirements
Make sure your computer meets the system requirements for Windows 10. Typically, computers with Windows 7 SP1 or Windows 8.1 update can upgrade to Windows 10 for free.
Run Windows 10 Update Assistant
Visit Microsoft’s official website, download and run the “Windows 10 Update Assistant” tool.
This tool will check whether your system meets the upgrade requirements.
Follow the Upgrade Guide
In the Update Assistant, follow the on-screen instructions. This will download and install Windows 10.
Complete the Upgrade
Once the upgrade is complete, your system will be running Windows 10 and will typically be in an activated state.
Install Windows 10 and Activate
If you wish to perform a clean installation rather than upgrade, you can follow these steps:
Download Windows 10 Installation Media
Visit Microsoft’s official website and download the Windows 10 installation media creation tool. The downloaded file name is: MediaCreationTool22H2
Create Installation Media
Run the creation tool, select the “Create installation media (USB flash drive, DVD, or ISO file)” option and follow the on-screen instructions.
Install Windows 10 Using USB Flash Drive
Choose to create installation media, such as a USB flash drive, to install Windows 10. In this option, you can either follow the “Use the recommended settings for this PC” or customize configurations, selecting different languages or architectures to suit the target computer where Windows 10 will be installed.
After selecting the USB flash drive option, click “Next.” Choose your USB drive from the list and continue by clicking “Next.” The installation program will automatically download Windows 10 and write it to your USB drive. Once this process is complete, you will see a message indicating that your USB flash drive is ready, then click “Finish.”
After completing the above steps, close the Windows 10 installation program and shut down your computer. If you plan to install Windows 10 on another computer, insert the USB drive into that computer. Start the computer and press the F12 or Delete key on the keyboard to enter UEFI or BIOS settings. From here, choose to boot from the USB installation program you created.
Once successfully booted to the USB drive, follow the on-screen prompts to complete the installation of Windows 10.
Skip or Enter Key
During the installation process, you may see a screen asking for your product key. You can choose to skip this step.
Finish Installation
Once the installation is complete, you will be prompted to activate Windows 10. Although an inactive watermark may appear, most key features are still available.
Activate Windows 10
Open Settings > Update & Security > Activation, select Change Product Key and enter a valid Windows 10 key.

Do I Need to activate Windows 10?
The difference between deactivating and activating Windows 10 lies in the state of the operating system and the associated features.
Activating Windows 10:
- Activating Windows 10 involves entering a valid product key to validate the operating system’s license and unlock its full features.
- Effects:
- Removes watermarks: Activating Windows 10 removes any watermarks on the desktop that indicate the system is not activated.
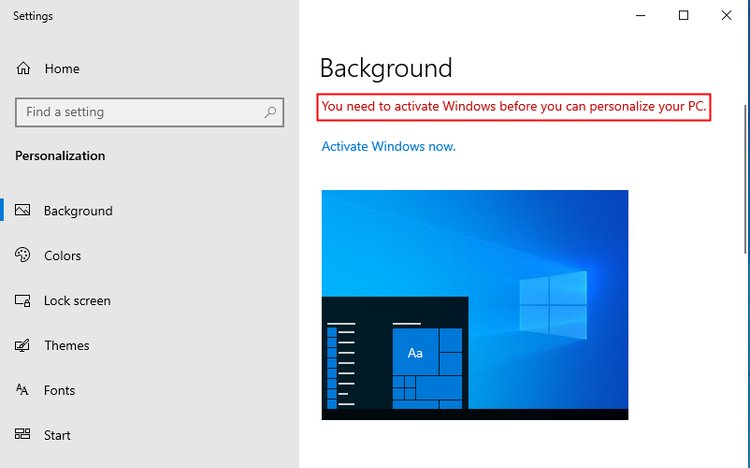
- Enables personalization: Users can customize wallpapers, colors, and other personalization options.
- Access to all updates: Activated systems receive all security updates and feature enhancements through Windows Update.
- Full access to Microsoft Store: Users can download and install all compatible apps from the Microsoft Store.
- Microsoft account integration: Allows syncing settings and preferences across devices through a Microsoft account.
- Eligibility for full technical support: Activated users are eligible for comprehensive technical support from Microsoft.
If you are facing budget constraints, Windows 10 remains functional even in an unactivated state. While using Windows 10 without activation, users can still access and utilize essential features of the operating system. However, certain limitations come into play, such as the presence of a watermark on the desktop, signaling the non-activated status. Additionally, personalization options may be restricted, and users might encounter some limitations in accessing certain Microsoft Store apps. Despite these constraints, the core functionalities of Windows 10, including regular system updates and basic usability, remain intact. It provides a viable option for users who may prioritize cost considerations while still needing to benefit from a functional operating system.